
Our Process
How We Refinish Aircraft With Precision
At Hova Aircraft Painting LLC, every project follows a disciplined refinishing process designed for clean prep, durable coatings, and a polished final presentation for aircraft owners nationwide.
Four Core Steps
Our workflow is built to protect the aircraft, control quality at each stage, and deliver a finish that looks sharp on the ramp and holds up over time.
01
Inspection And Planning
We begin by reviewing the aircraft condition, existing finish, design goals, and scheduling needs so the scope is clear before work starts.
02
Surface Preparation
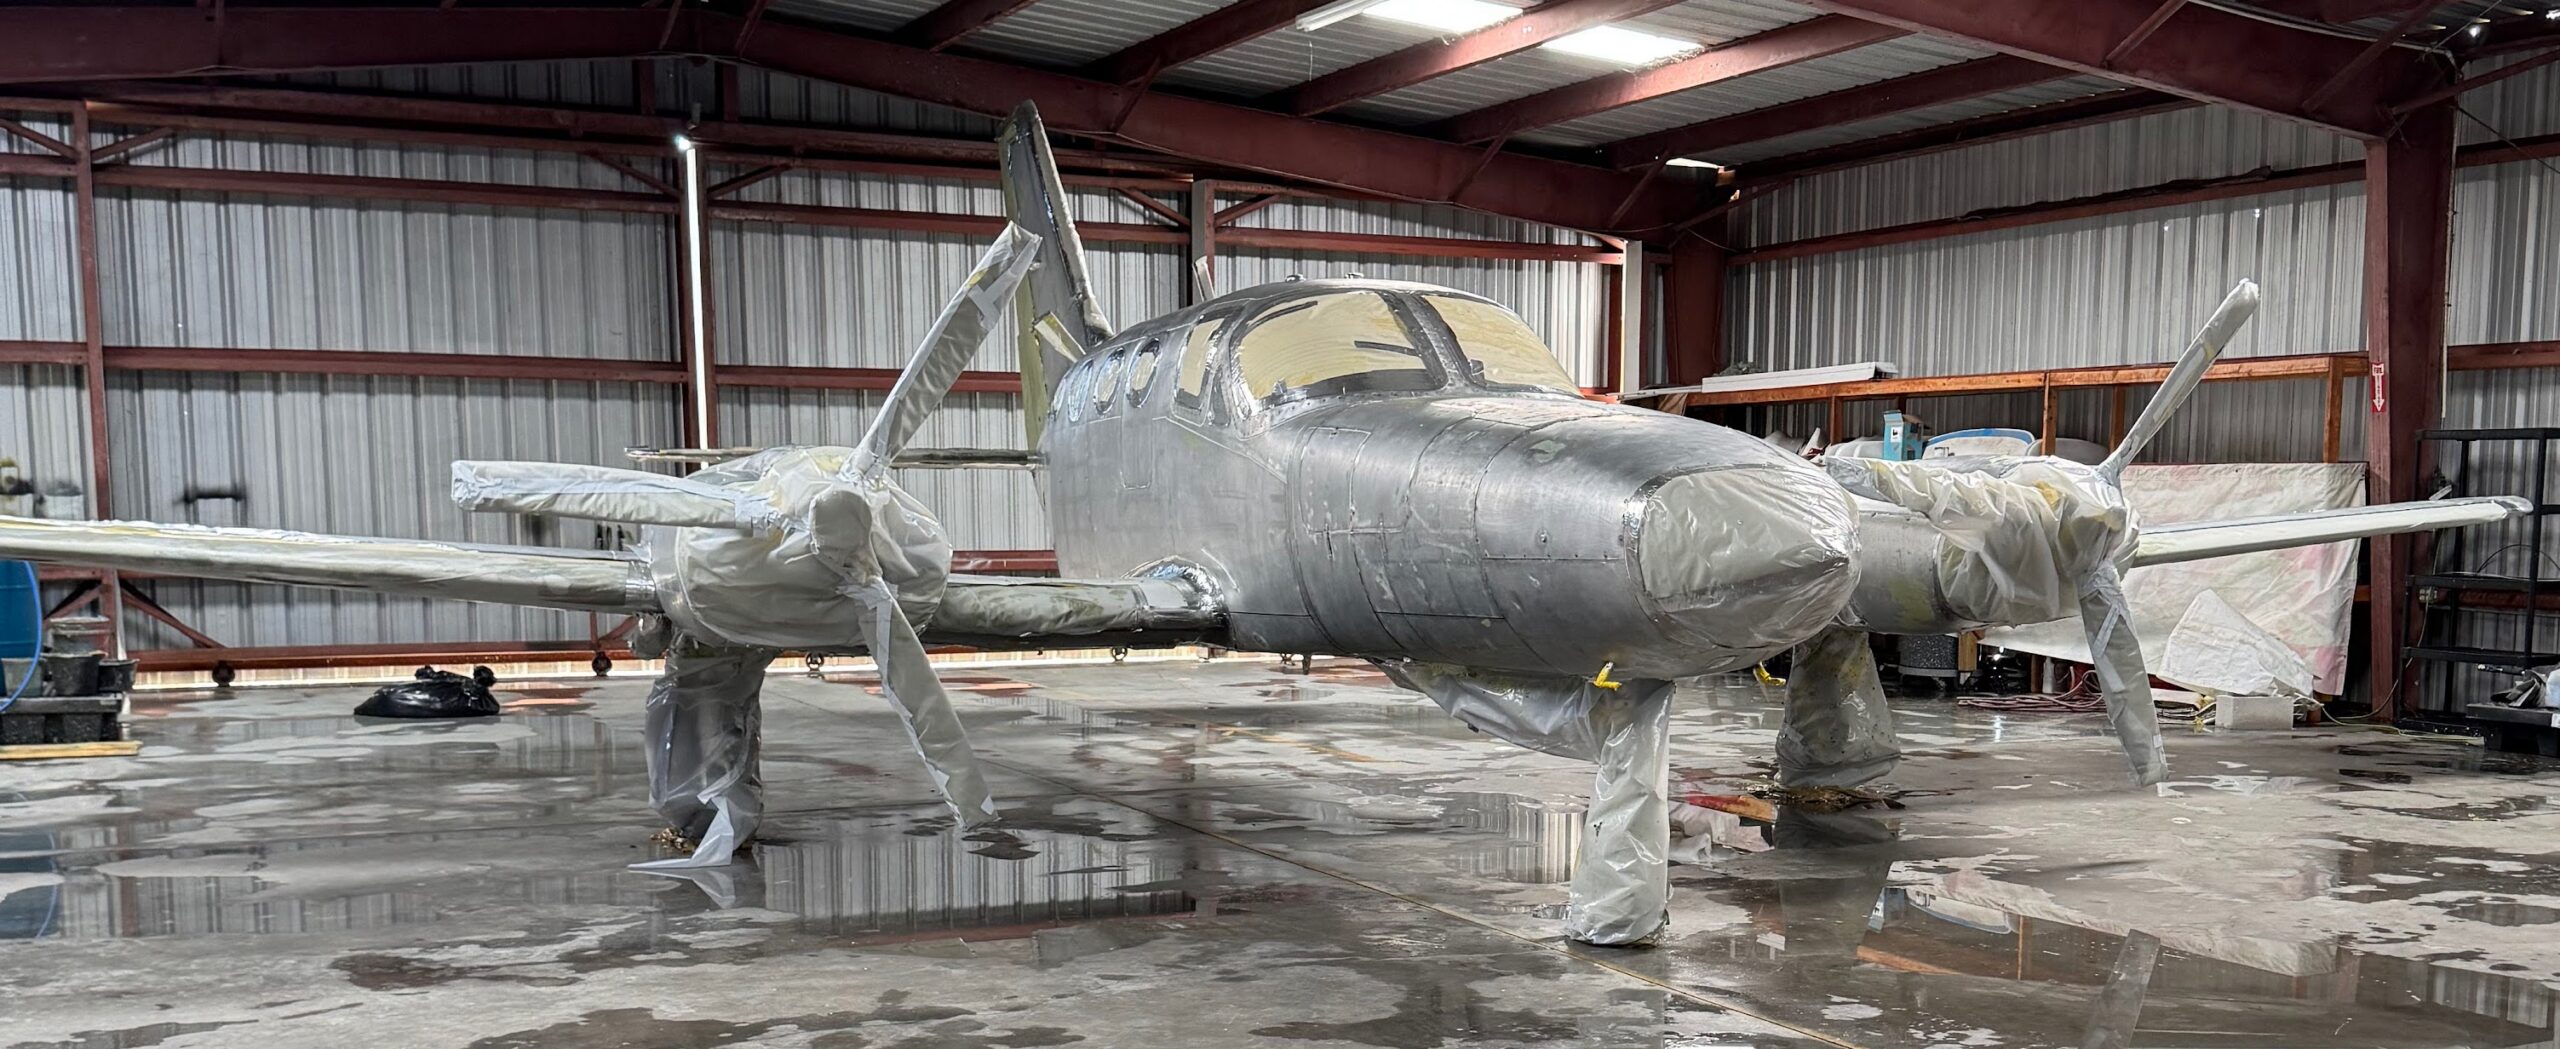
Old coatings, contaminants, and surface imperfections are addressed carefully to create the clean foundation required for proper adhesion and a smooth result. Metal surfaces are Alodined and etched for corrosion protection and to promote adhesion of the primer.
Process matters. Careful prep and controlled application are what separate a short-term cosmetic change from a finish built to last.
03
Paint Application
Primer, color, striping, and finishing coats are applied with close attention to consistency, coverage, and visual alignment across the aircraft exterior.
04
Final Review And Delivery
Before release, we complete a detailed review of finish quality, overall presentation, and project readiness so owners receive an aircraft that looks complete and professionally finished.
Standards
What Guides The Work
Our process is shaped by craftsmanship, consistency, and communication from intake through final handoff.
Preparation Standards
Thorough prep supports coating performance and helps produce a cleaner, more uniform final appearance.
Material Selection
Coating systems are chosen with attention to durability, finish quality, and the visual goals of the project.
Application Control
Each stage is handled methodically to maintain even coverage, crisp transitions, and a refined exterior result.
Owner Communication
Clear updates help aircraft owners understand progress, expectations, and the path to project completion.
Process Questions
Common questions from aircraft owners planning a paint or refinishing project.
How do you start a project?
We begin with a conversation about the aircraft, finish condition, design goals, and timing so we can define the scope clearly.
Why is surface prep so important?
Preparation affects adhesion, smoothness, and the overall look of the completed finish, making it one of the most important stages.
Can you handle custom paint layouts?
Yes. Custom striping, color planning, and visual detailing can be incorporated as part of the refinishing process.
DESCRIBE THE PROCESS YOU USE FOR A FULL STRIP AND PAINT ON A METAL AIRCRAFT?
Once the aircraft has been fully inspected and any issues discussed with the owner we move onto the stripping stage. All of the areas that will not be stripped and need to be protected such as windows, tires, antennas, external lights etc are fully wrapped using high quality materials. An environmentally sensitive stripper is applied to the entire aircraft and left overnight to do its work. This causes the paint to bubble off the surface and dry up so that we can apply a high pressure water hose to remove the residue. A single application of stripper is included in your quote and, in most cases is sufficient. If an aircraft has been overpainted and has several generations of paint and/or has been previously painted with non-standard paints, additional strips might be needed at an extra cost.
At this point, all of the control surfaces are removed along with wing tips, cowlings and other fairings so that they can be finished by hand and to allow us access to strip the areas that would normally be covered by these items.
Once the aircraft and removed components have been fully stripped, the airframe is inspected for surface issues such as corrosion, old body fillers or other surface defects that need to be addressed. We include up to ten hours for any needed bodywork in our quoted price. If we see that additional work is necessary, we will contact you in advance and discuss the issues and additional costs along with photos as needed. Where fairings, wing tips and other plastic or fiberglass components are cracked or in very poor condition we will discuss with you the costs and time needed for repairs versus buying replacements.
Once all the surfaces have been prepped and any bodywork completed, we apply Alodine followed by an etching process that is designed to improve adhesion of the paint to the metal surfaces.
The next step in the process is to apply a high quality primer followed by three coats of the chosen aviation specific white base coat – other colors can be chosen at a higher price linked to the material costs. The way each coat is applied is critical to ensuring no “orange peel” effect, no paint runs and no pooling of paint around rivets.
Once the base coat has been completed dried and inspected, work begins on laying out the design. A standard quote includes a single non-metallic base (white) and two non-metallic trim colors along with standard sized N Numbers. More complex designs are quoted at higher rates due to the additional material costs, the need to do multiple wraps and a lot of extra labor time.
The controls surfaces and other fiberglass and metal parts that were removed are all finished separately. The inside of the cowling(s) are primed but not painted with a base coat unless requested at an extra cost.
The paint finish is inspected for conformity and buffed or remediated if necessary.
Once the final paint inspection has been completed, all of the previously removed parts and control surfaces are replaced and balanced, new stainless steel screws are used to replace the old ones, new airframe placards and decals are applied and the windows are sealed. Wherever, there are walkways on wings etc, we apply a new non-slip coating. When the quick release cowling mounts are removed, we inspect them and, if in good condition will do our best to clean them prior to re-installation. If any are missing or in very poor condition, we will inform you and give you the option of providing us with new ones that we will fit at no extra cost, or we will source them and charge you for the parts but not the labor. We can also, at an extra cost, replace door seals if they are worn out.
The final step is a last clean, polish and inspection followed by a walk-around by the customer to ensure everything is to their satisfaction.
Please note that, a new weight and balance is not included in the standard price because it is not necessary where existing paint is replaced with new paint without any other modifications.
Do you work with out-of-state owners?
Yes. Hova Aircraft Painting LLC serves aircraft owners and operators from across the country.
What happens before delivery?
We complete a final review of finish quality and overall presentation before the aircraft is prepared for handoff.
How do I request a quote FROM YOU?
Use our contact page to tell us about your aircraft and project goals, and we will follow up with next steps.
DESCRIBE THE PROCESS YOU USE FOR A FULL RE-PAINT OF A COMPOSITE AIRCRAFT?
Composite and fabric aircraft cannot be prepared for paint via chemical stripping, so they have to be sanded. While this is more time consuming than chemical stripping, there is not going to be any dents or corrosion that need a lot of finishing. However, any paint that may be peeling off composite surfaces could be as a result of concealed damage or delamination as opposed to age related paint deterioration. In the event of delamination or other damage that is considered structural, the owner will need to involve a qualified mechanic and/or the factory as we are not qualified to carry out structural repairs. A factor that can significantly affect the paint process is where the airframe has been polished with a silicone based product. Silicone, by its nature gets absorbed into the paint surface and potentially into the composite substrate leading to significant adhesion challenges when trying to apply new paint.
Because no stripper is used the first step is to remove all of the control surfaces along with wing tips, cowlings and other fairings so that they can be finished by hand and to allow us access to sand and paint the areas that would normally be covered by these items.
Once the aircraft has been sanded and inspected for issues including old body fillers or other surface defects that need to be addressed. We include up to ten hours for any needed bodywork in our quoted price. If we see that additional work is necessary, we will contact you in advance and discuss the issues and additional costs along with photos as needed. Where fairings, wing tips and other plastic or fiberglass components are cracked or in very poor condition we will discuss with you the costs and time needed for repairs versus buying replacements.
The plane is wrapped to protect surfaces that will not be painted such as windows, tires, antennas, external lights, engine etc.
The next step in the process is to apply a high quality primer followed by three coats of the chosen aviation specific white base coat. It is important to note that most manufacturers of composite aircraft do not permit the use of other colors as a base coat due to potential issues with the potential for excessive heating of the composite materials. The way each coat is applied is critical to ensuring no “orange peel” effect and no paint runs.
Once the base coat has been completed dried and inspected, work begins on laying out the design. A standard quote includes a single non-metallic base (white) and two non-metallic trim colors along with standard sized N Numbers. More complex designs are quoted at higher rates due to the additional material costs, the need to do multiple wraps and a lot of extra labor time. Trim colors are acceptable on composite aircraft, but, designs with multiple solid colors may need to be cleared first with the manufacturer to ensure continued airworthiness.
The controls surfaces and other fiberglass and metal parts that were removed are all finished separately. The inside of the cowling(s) are primed but not painted with a base coat unless requested at an extra cost.
The paint finish is inspected for conformity and buffed or remediated if necessary.
Once the final paint inspection has been completed, all of the previously removed parts and control surfaces are replaced and balanced, new stainless steel screws are used to replace the old ones, new airframe placards and decals are applied and the windows are sealed. Wherever, there are walkways on wings etc, we apply a new non-slip coating. When the quick release cowling mounts are removed, we inspect them and, if in good condition will do our best to clean them prior to re-installation. If any are missing or in very poor condition, we will inform you and give you the option of providing us with new ones that we will fit at no extra cost, or we will source them and charge you for the parts but not the labor. We can also, at an extra cost, replace door seals if they are worn out.
The final step is a last clean, polish and inspection followed by a walk-around by the customer to ensure everything is to their satisfaction.
Please note that, a new weight and balance is not included in the standard price because it is not necessary where existing paint is replaced with new paint without any other modifications.